Magic Kingdom Purple Palace

I seriously cannot believe how many photos from the Magic Kingdom have blue and purple as the predominant colors. Hey paper manufacturers, why are all of your Disney inspired collections red, light blue, and yellow? Could we maybe get some purple? Pretty please? When the castle is lit up at night, it’s in blue, pink, and purple tones. I would love to see a collection to match!

For this layout, I immediately gravitated towards that ombre purple background paper. That has to be one of my favorite papers of all time. I paired that with the darker purple paper that I purchased back in 2006 or 2007. I paid a whopping 10 cents for it on sale. That’s right. I’ve held onto a piece of paper for 15 years that cost me a dime. It was finally time for it to shine. I also used some cardstock in order to help the photo pop from the background.

I’ve mentioned before how limited I am when it comes to purple embellishments. For this layout, I decided to let the color of my shirt and the pinkish bit in the middle of the castle to help alleviate this issue. There are still a few bits of purple. The bluish purple piece with the “Hearts” tab was from a set of card blanks I purchased over a decade ago. This was a divider in that set. I knew I had held onto it for a reason. I also recently bought a die-cut pack that only has purple pieces. That’s where I got the “Be-You-Tiful” die. Lastly, I sprinkled a few tiny purple gems here and there.

I decided to also use some maroon, pink, and white for contrast. The maroon dies are from a fall themed pack. I love it when I can use embellishments in a different way than they were intended. I was thrilled to also use the black and white flowers. They’ve been in my stash for a couple of years, and I had no idea of how to use them. This seemed like a perfect opportunity. There was also a ton of joy in using up those itty bitty words and phrases to the right of the photo. They were exactly what I needed to help fill in that empty space. There is something incredibly satisfying about using up supplies that have flummoxed you for quite some time.

Disney tip: It’s not easy to get a photo without a million people in the background when you are at Disney. As Disney returns to normalcy, I would encourage people to consider buying the tickets for extended evenings. Yes, it is ridiculously expensive. We essentially paid a full day’s ticket for an extra 3 or 4 hours at Magic Kingdom. 3 or 4 hours where we walked through Liberty Square, Adventureland, and Frontierland often with no people in sight. I rode Splash Mountain with no one else in my log. (Hence the giant wet spot on my shirt in this photo.) And, it allowed us photos without people in the background. For the two of us, it was worth it.
Simple

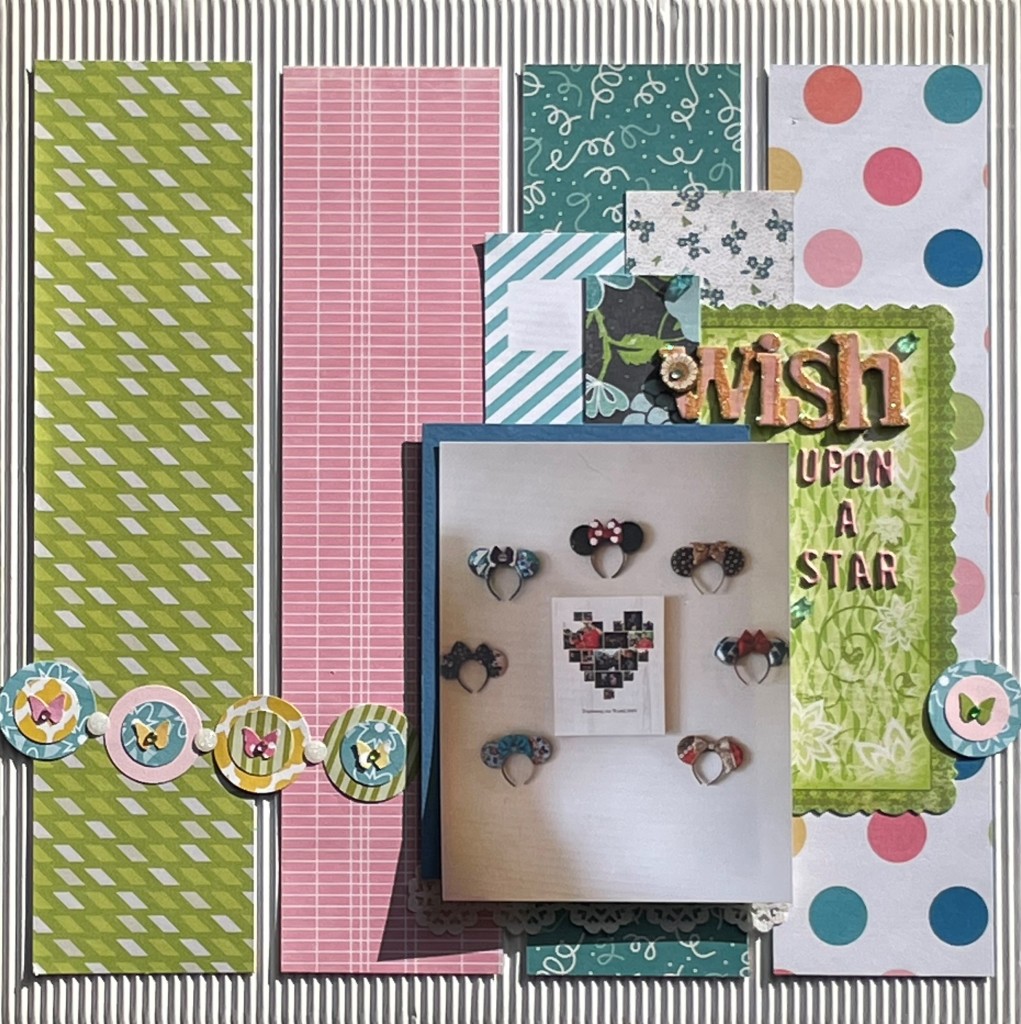
Sometimes you just need a layout to be simple. Often that means using one of my “go-to” designs. This time I settled upon a brand new design that was really straight forward. I admit that this photo almost makes it look too simple. Still, I love the look of it in person.

This layout begins with a less than eye-catching photo. I had snapped a quick photo of my ear wall to send to a couple of friends. It was the middle of winter, the lighting was poor, and I was in a hurry. Still, I decided I wanted to remember this odd decorating feat. I knew that with the variety of colors represented against a semi-white background would require a bright splash of color in the background. In this case, I began with that giant polka-dot paper. It helped me choose the other colors that I wanted to include in the layout. I used a great sketch found on Jamie Leija’s blog from 2010. You can find it here.

I stayed pretty true to the sketch. I allowed the paper to be the primary source of embellishment. That green paper to the right of the photo is part of a small notebook (from BoBunny I believe), that’s been in my stash for over a decade. That was the only paper around the photo in the sketch. However, I felt it was a bit too plain, and added in a few more scraps. Any chance to use up more scraps makes me so happy!

There were some stitched circles used as embellishment in the sketch. That wasn’t going to work for me. I don’t currently have a sewing machine. Additionally, since I chose that awesome corrugated paper as my background, even hand stitching was out of the question. Instead, I decorated each circle with a tiny butterfly and a matching gem. I “tied” them together with some iridescent enamel dots.

The final touch was adding in the title. As usual, I didn’t preplan anything. Luckily, I found that chipboard “wish” in my ancient belongings. The color matched, and it fit perfectly within the space. And then… I was staring at all of that empty green real estate beneath. I could have added journaling, but there wasn’t much to say. So, I decided to see if I could expand the title. I found those cute little pink puffy stickers that weren’t even opened yet. I love how the title is Disney themed, and looks like I planned it all along.

Using Up Old Materials

I buy far more scrapbooking supplies than I use. Shocking… I know. As a result, I honestly don’t even know what I have. One of the biggest mistakes I make is buying paper collections. I am simply not a collection scrapbooker. In the last decade, I’ve used up (mostly) 2 collections. One of them I purposely gave myself a “bust the collection” challenge in order to use it all. So, it was time to choose an old collection and see if I could get a bit of it used.

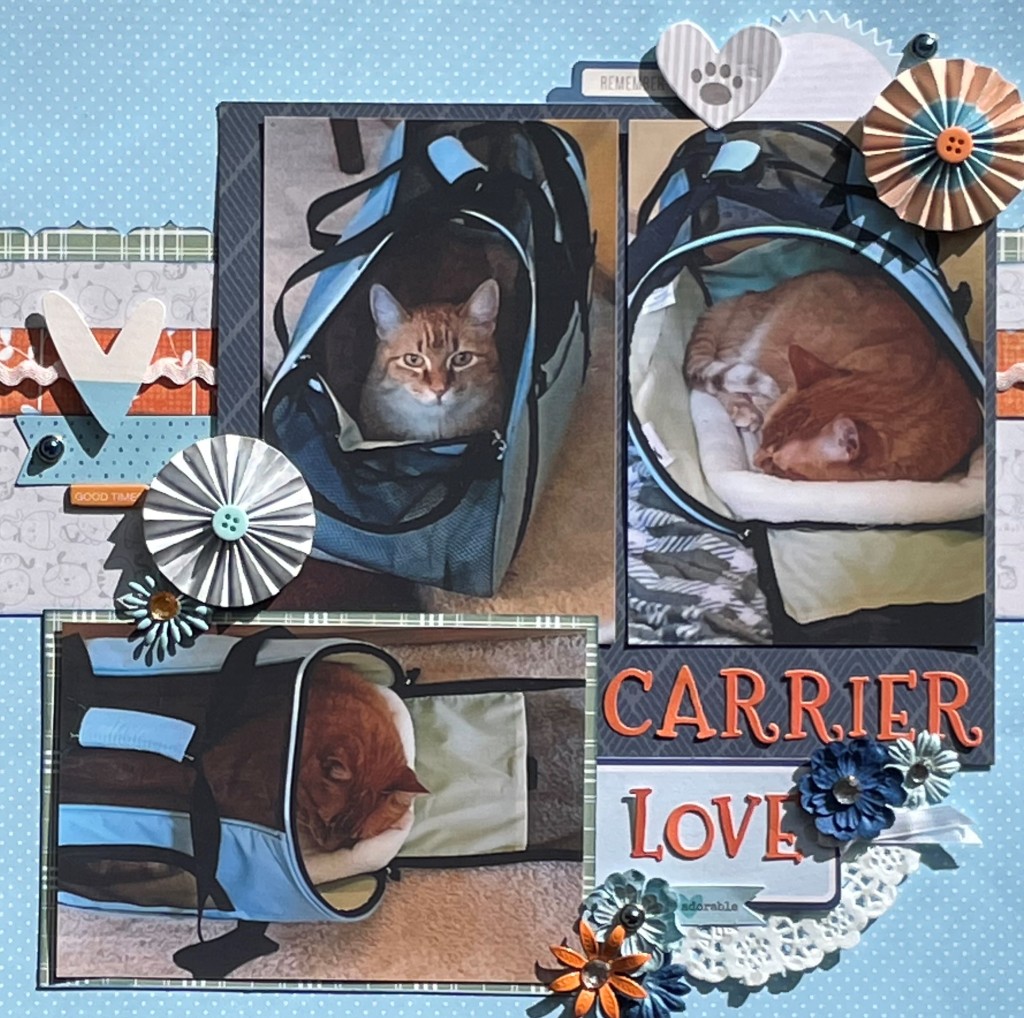
I am going to be real. I had very high hopes for getting at least 2 papers from the collection out of my stash. In the end, I used part of 1 paper. That’s right, not even a full paper from that collection was used in the end product. I chose that cute grey kitty paper. The other colors in the collection just didn’t work well with the colors in my photos. So, I found the light blue dot paper to match the carrier. I pulled the orange strip and navy block from my scrap bin. The moss green was a 6×6 paper. It always amazes me how little paper is actually needed to make a layout.

This isn’t my favorite layout. Three photo layouts rarely are. I think I prefer it when I have more space to play with. Once 3 photos are on a page, there’s just some small odd rectangles left for embellishing. I am also not in love with the whole orange and blue scheme. It makes sense. Orange cat + blue carrier = orange and blue layout. I know that orange and blue work together in theory. It just has never looked good to my eye. Sometimes you wind up going the direction your photos tell you to go.

I think my favorite part of this layout is using up old embellishments. The only thing on this layout that I purchased in the last couple of years is the blue tag. The flowers are all at least a decade old. As a bonus, I finished off the pack of metal flowers I purchased in my first year or two of scrapbooking. The stickers, gems, brads, doilies, and alphabet stickers have all been taking up space for years. This is why I rarely purge my materials. Eventually they find their way onto a page.

I am making it a goal to embellish a bit more than normal. I am pretty happy with how the embellishment clusters came out. They all include both layering and multiple textures. There’s paper, metal, buttons, gems, stickers, die-cuts, ribbon, and chipboard all represented on this layout. So, let’s call this page a win… even if it isn’t my prized work of art.